How to Install a Home Security Camera Yourself: Step-by-Step DIY Guide
In today’s digital world, installing a home security camera is no longer a luxury—it’s a necessity. Whether you live in an apartment, a bungalow, or a rural farmhouse, home security cameras help deter burglars, monitor visitors, and ensure peace of mind.
Thanks to the rapid advancement of smart home technology, many security camera systems today are DIY-friendly, meaning you can install them yourself without hiring a professional technician.
In this article, we’ll walk you through how to install a home security camera on your own, including the tools you’ll need, mistakes to avoid, and pro tips to get the best results. We’ll also include a comparison table to help you decide between wired vs wireless cameras, and other important features.
🛠️ Tools and Equipment You’ll Need
Before you begin, gather the following items:
- Your home security camera kit
- Smartphone with the brand’s official app
- Screwdriver or drill machine
- Screws and wall anchors (usually included)
- Mounting brackets
- Ladder (for outdoor cameras)
- Extension cords or power adapters
- Internet router (for Wi-Fi models)
Most modern DIY security cameras come with everything pre-packed, including the wall mount kit and power adapters.
🧱 Step-by-Step Guide: How to Install a Home Security Camera Yourself

Step 1: Choose the Right Camera
There are various types of security cameras available:
- Wired cameras – Require constant power and video cable connection (good for permanent installations).
- Wireless cameras – Use Wi-Fi for data transmission but still need power (via adapter or battery).
- Battery-powered cameras – Completely wire-free, great for renters.
- Indoor vs Outdoor – Weatherproof outdoor models have better durability and night vision.
Popular DIY camera brands in India (and globally):
- TP-Link Tapo
- Mi Home Security Camera
- CP Plus ezykam
- Realme Smart Cam 360
- Blink by Amazon
- Arlo
- Wyze (imported)
Step 2: Decide Camera Placement
The key to great security is strategic placement.
📍 Common Camera Locations:
| Location | Why It Matters |
|---|---|
| Front door | 34% of burglars use the front door |
| Backyard/garden | Often overlooked access point |
| Garage/parking area | Monitor vehicles and entrances |
| Living room | General surveillance |
| Nursery | Baby monitoring |
| Hallways/staircases | Track movement inside home |
✅ Tip: Install cameras 8–10 feet high for optimal coverage and security.
Step 3: Power Source Planning
Wireless and smart cameras need:
- Power adapter and socket nearby, OR
- Rechargeable battery models (check battery life every 1–3 months)
For wired cameras, you may need to plan cable routing:
- Use cable clips, trunking, or cable raceways for neat setup.
- Outdoor wires should be weather-protected using conduit pipes.
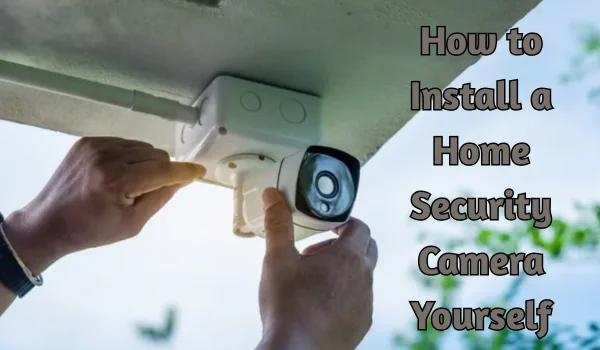
Step 4: Mount the Camera
- Use the mounting template (usually in the box).
- Mark screw holes on the wall using a pencil.
- Drill holes and insert wall plugs (if provided).
- Screw in the mounting bracket.
- Attach the camera securely to the mount.
🔧 Pro Tip: Adjust the camera angle before fully tightening the screws.
Step 5: Connect to App & Network
Almost all modern cameras have an official mobile app.
- Plug the camera into power (or turn it on if battery-operated).
- Download the app (e.g., TP-Link Tapo, Mi Home, Arlo).
- Create an account and sign in.
- Tap “Add Camera” or “+” sign and follow on-screen instructions.
- Connect your camera to your 2.4GHz Wi-Fi network.
- Name your camera and test the live feed.
📱 Most apps allow remote viewing, motion alerts, and cloud storage options.
Step 6: Test and Optimize
After installation:
- Walk around the camera’s field of view to test motion detection.
- Turn lights on/off to test night vision.
- Try accessing the feed remotely.
- Set motion sensitivity, activity zones, and alert frequency in the app.
🎯 If needed, tweak the camera angle or sensitivity to reduce false alerts (like passing cars or animals).
📊 Wired vs Wireless vs Battery-Powered Cameras
| Feature | Wired Camera | Wireless (Wi-Fi) Camera | Battery-Powered Camera |
|---|---|---|---|
| Installation | Complex (professional preferred) | Easy DIY | Very easy |
| Power Source | AC power via cable | Plug-in adapter | Rechargeable battery |
| Internet Use | Ethernet preferred | Wi-Fi | Wi-Fi |
| Best For | Large homes, 24/7 recording | Standard users | Renters, no-drill zones |
| Portability | Low | Medium | High |
| Video Quality | High (up to 4K) | Medium–High | Medium |
| Cloud Support | Optional (depends on model) | Yes | Yes |
| Cost | ₹5,000–₹20,000+ | ₹2,000–₹10,000 | ₹3,000–₹12,000 |
🧠 Tips for Better DIY Camera Installation
- Avoid placing cameras directly against glass – glare will reduce night vision.
- Use camera settings to reduce alerts from pets or tree movements.
- Install a UPS or battery backup for wired cameras to keep them running during power cuts.
- Place outdoor cameras under an eave or shade to protect from sun/rain.
- Always update firmware from the app to ensure security and performance.
❗ Common DIY Installation Mistakes to Avoid
| Mistake | Why It’s a Problem |
|---|---|
| Placing too high or too low | Misses faces or license plates |
| Poor Wi-Fi signal | Causes lag or disconnects |
| Skipping password protection | Security risk for your footage |
| Facing directly at sun or lights | Causes poor exposure or glare |
| Not using secure mounting | Can be tampered with easily |
🔐 Local Storage vs Cloud Storage
Most cameras offer two storage options:
- Cloud Storage – Convenient, accessible from anywhere. Monthly fees apply.
- Local Storage – Usually via SD card (16GB–128GB). One-time cost, but less secure if stolen.
If your camera supports both, enable cloud backup for critical areas like entry points.
🛒 Recommended DIY Security Cameras in India (2025)
| Brand | Model | Price Range | Key Feature |
|---|---|---|---|
| TP-Link Tapo | C200/C225 | ₹2,000–₹3,500 | 360° view, motion tracking |
| Mi | 360° Home Security | ₹2,899 | AI motion detection, app control |
| CP Plus | Ezykam+ | ₹2,000–₹4,000 | Indian brand, good support |
| Realme | Smart Cam 360 | ₹2,799 | Night vision, privacy shutter |
| Arlo | Essential Indoor/Outdoor | ₹8,000–₹15,000 | Premium quality, smart alerts |
Installing a home security camera yourself can be a weekend project that pays dividends in safety, awareness, and peace of mind. With plug-and-play smart cameras, intuitive mobile apps, and improved affordability, you no longer need to rely on expensive technicians or CCTV installers.
Whether you’re protecting your front gate, monitoring deliveries, or keeping an eye on your child or pet, DIY home camera systems put the power of security in your hands.